
Exporting Azure Resources
This guide outlines the steps involved in exporting Azure Resources.
Step by Step Guide:
# | Steps |
|---|---|
1 | Login to Azure Portal as a Global Administrator. |
2 | In the Azure Search bar, type in All Resources. Under Services, click on All Resources. 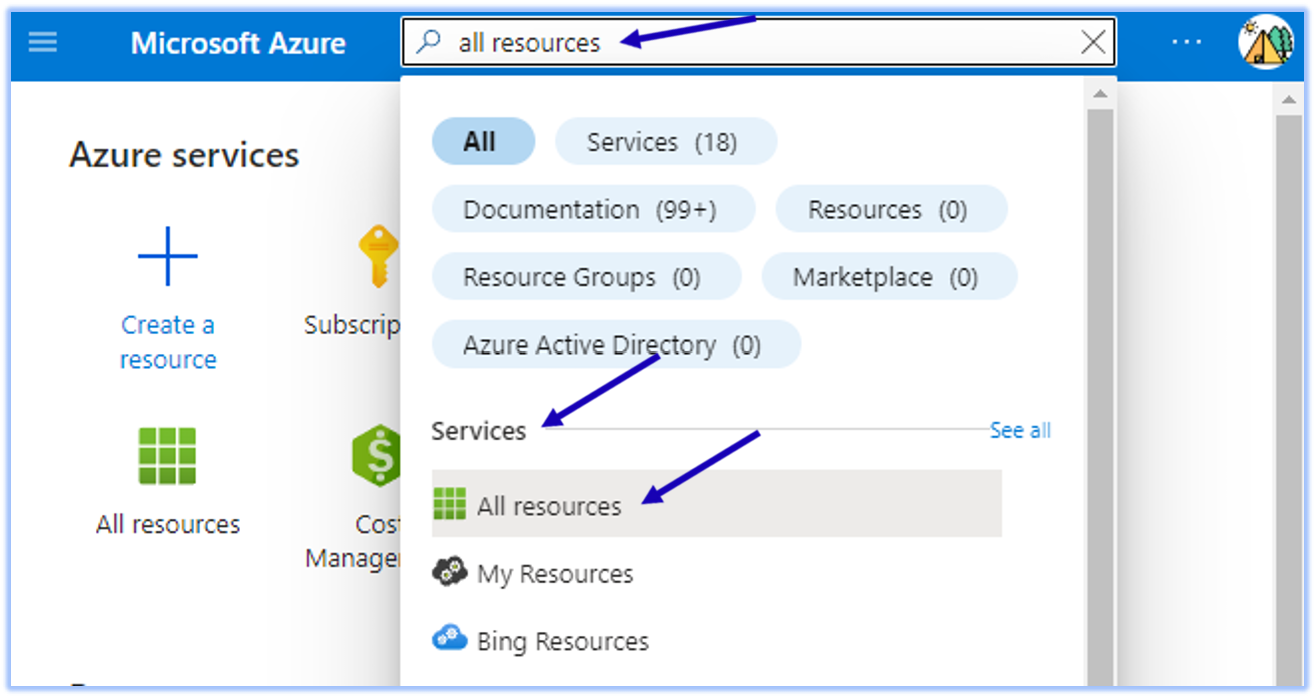 |
3 | Under Manage View drop down, click on Edit Columns. 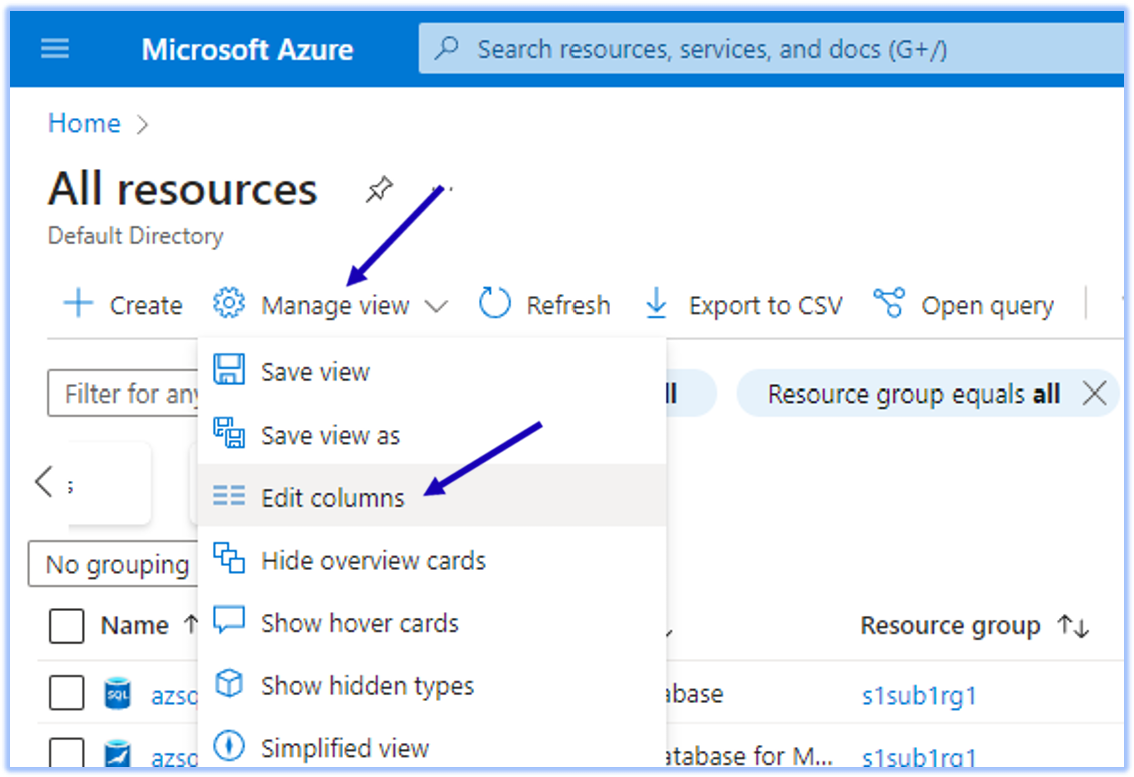 |
4 | On the Edit columns side panel, Click on Add Column. 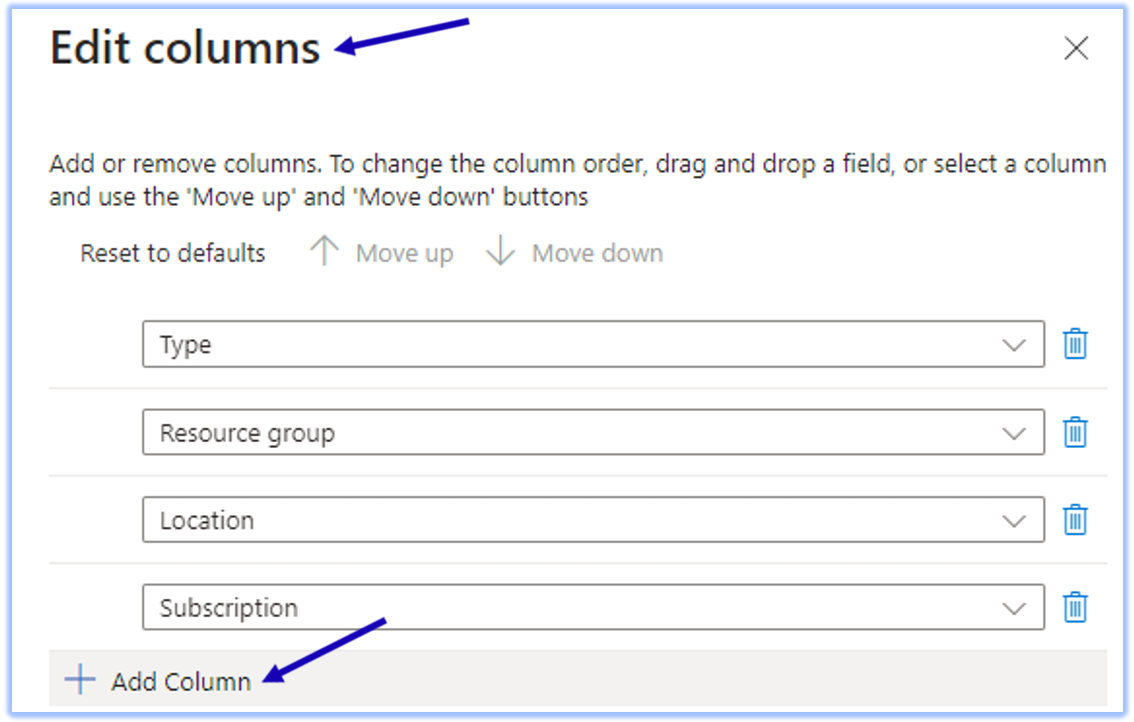 |
5 | On the new column field, specify Resource type, then click on Save. 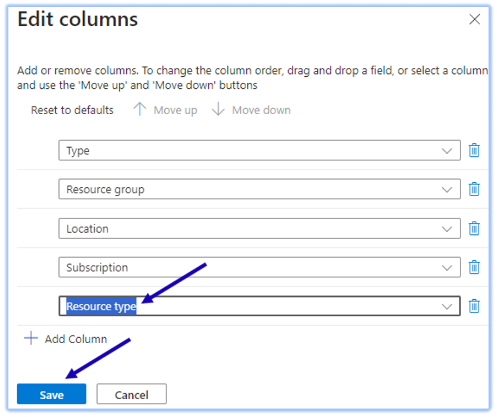 |
6 | Under Subscription, tick on All, then click on Apply. 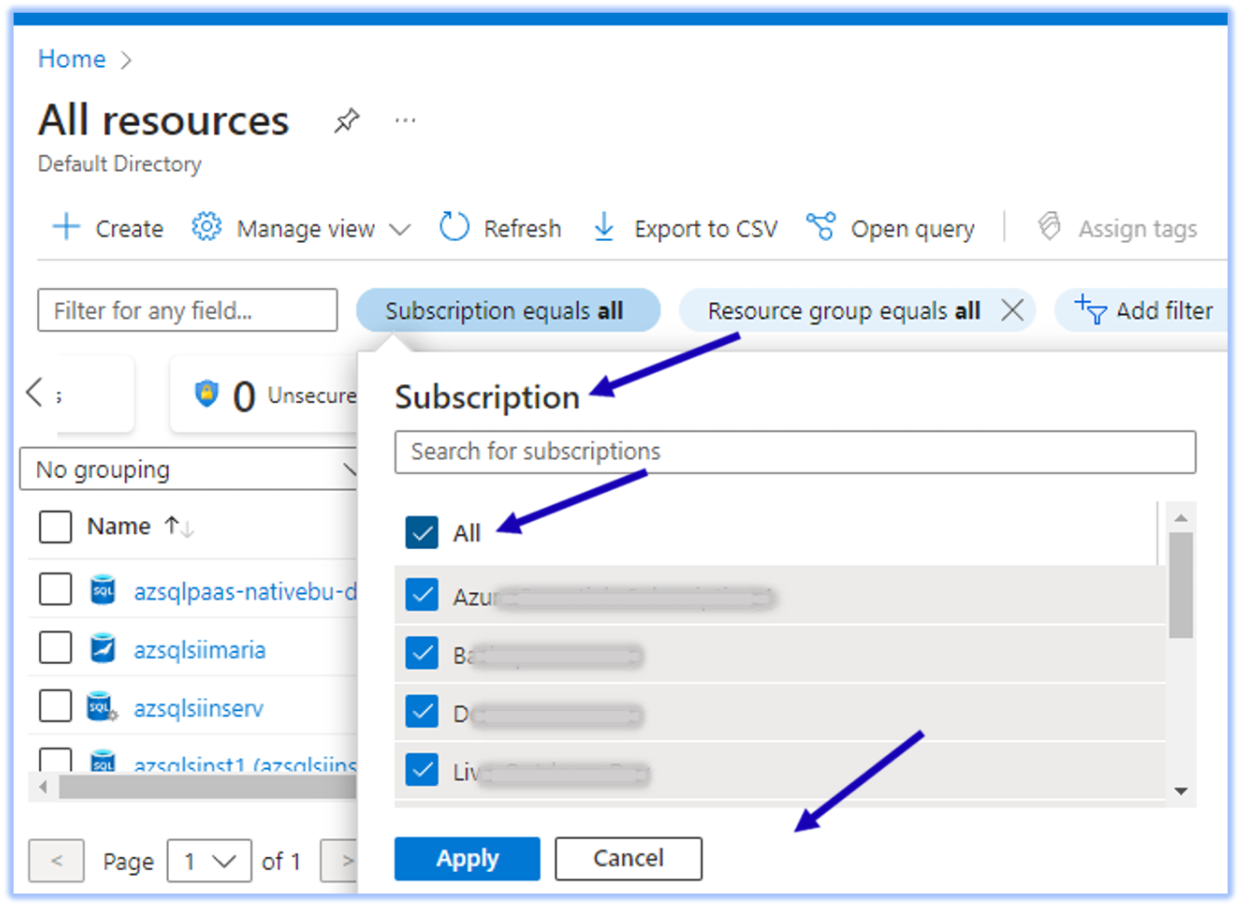 |
7 | Under Resource Group filter, tick on All, then click on Apply. 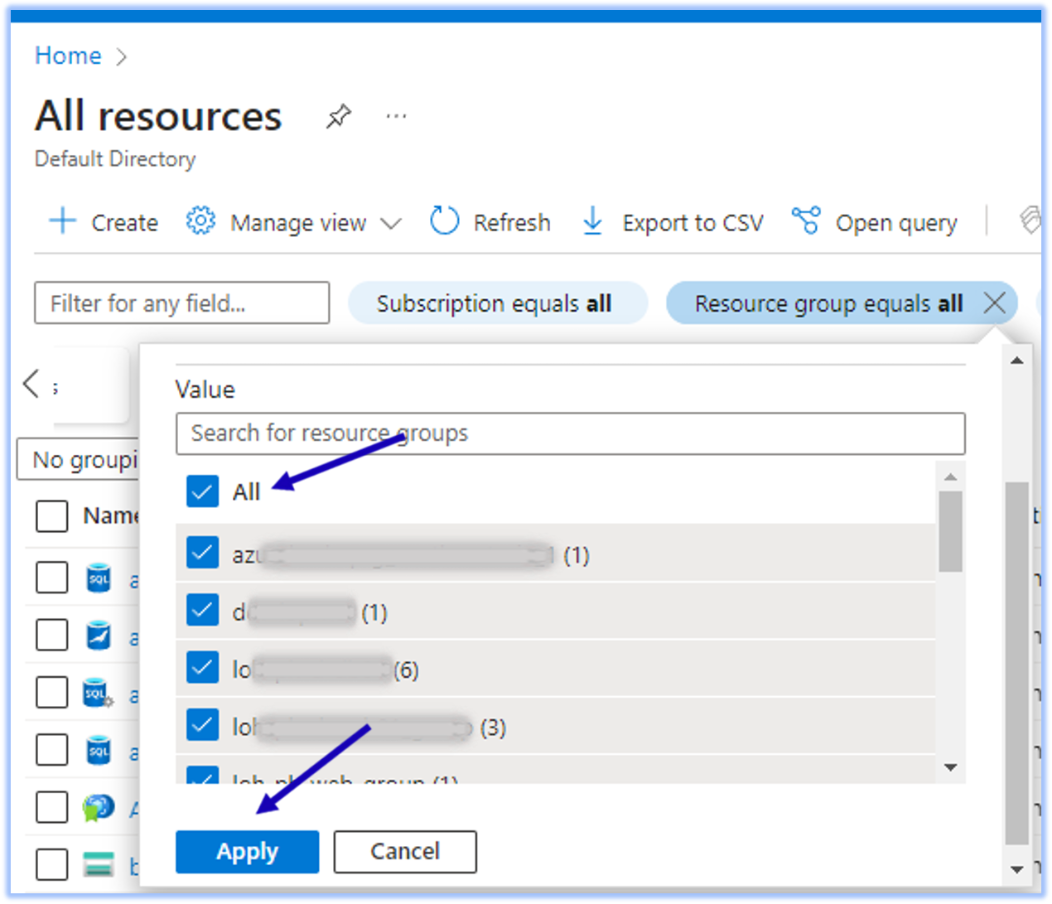 |
8 | Click on Export CSV. Save this to your local machine. 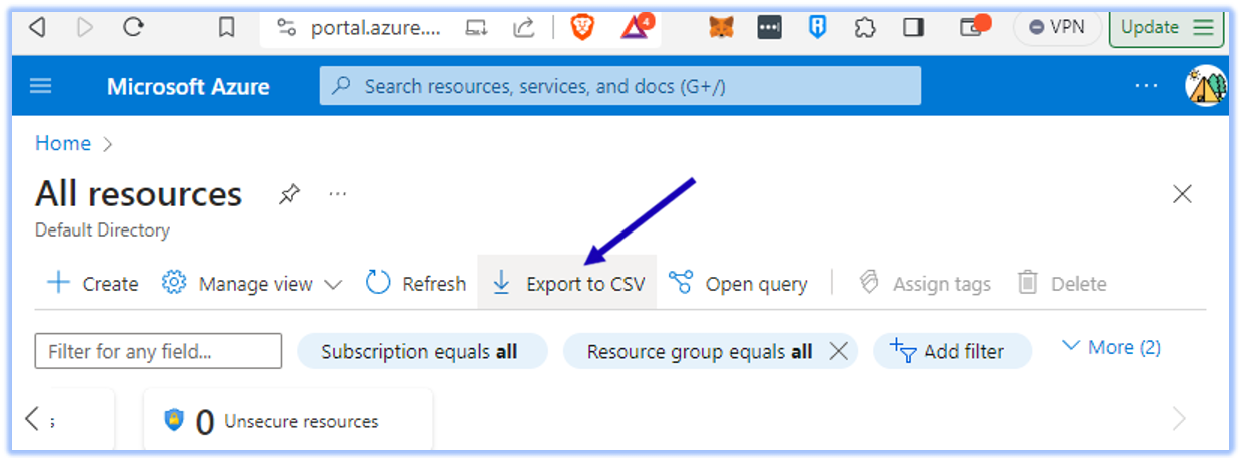 |